
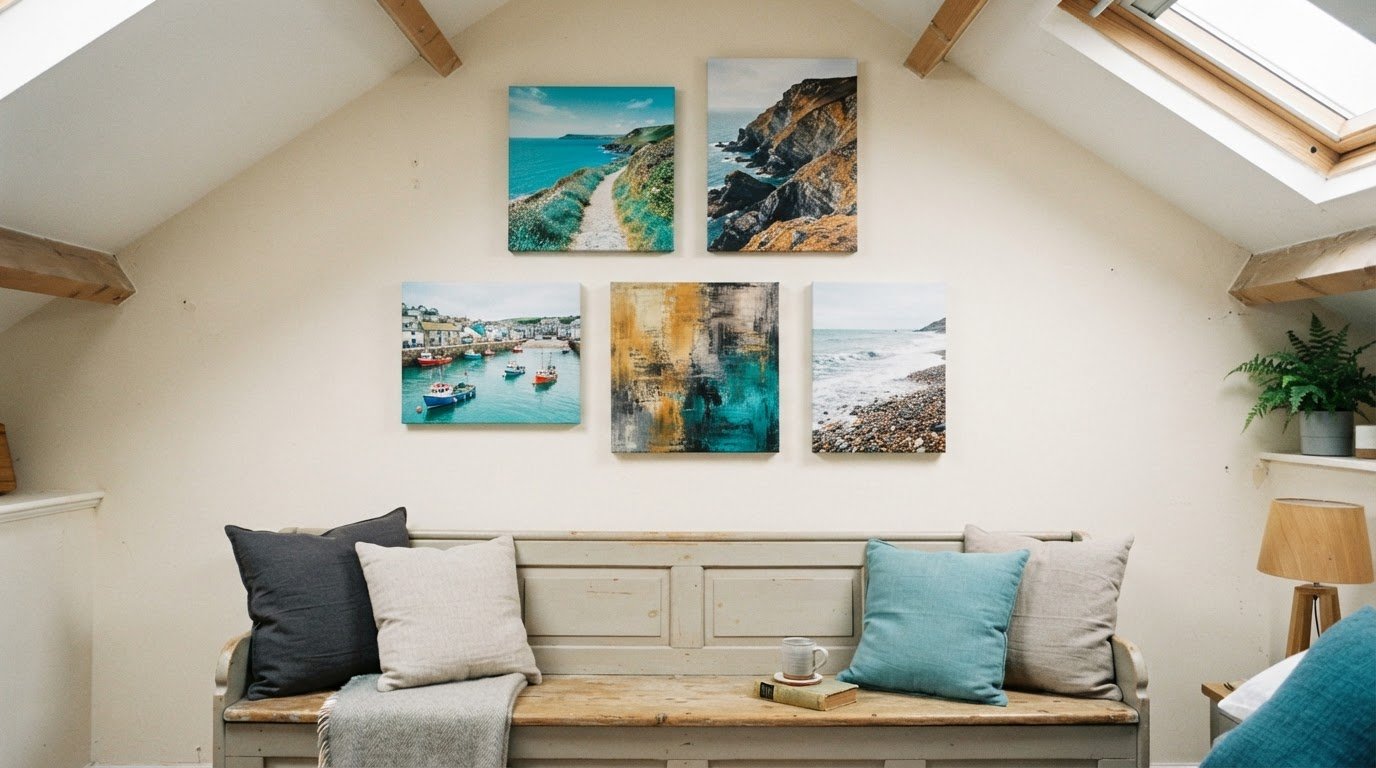
A canvas gallery wall doesn’t have to be finished all at once. Leave room to grow and choose pieces that share a colour or theme, so you can add to it later. To learn how to create a gallery wall with canvas prints, start with a flexible plan rather than treating the first arrangement as final.
It’s easy to want every picture to match, but personal photos and artwork can look just as cohesive when their colours or subjects connect. Plan the overall shape first, so new canvases can join the display without making it feel crowded.
Choose photos that suit the room, settle on a palette, then balance canvas sizes and orientations in a layout that works on your wall. You’ll also learn how to add decorative touches and test the arrangement with paper templates before hanging anything. Start simply, leave yourself options and build a gallery wall that feels like home.
Key Takeaways
- Choose photos that suit the room, then use a shared colour palette or theme to bring the display together.
- Measure your wall and plan canvas sizes and orientations before settling on a balanced layout.
- Mix personal photos, artwork and decorative touches to give the arrangement interest and character.
- Cut paper templates to test the spacing and overall shape before you hang your canvases.
Choosing photos and coordinating their colours with the room
Connect the display to the room before choosing pictures. A shared colour or theme can bring personal photos and artwork together.
-
Choose a shared colour palette
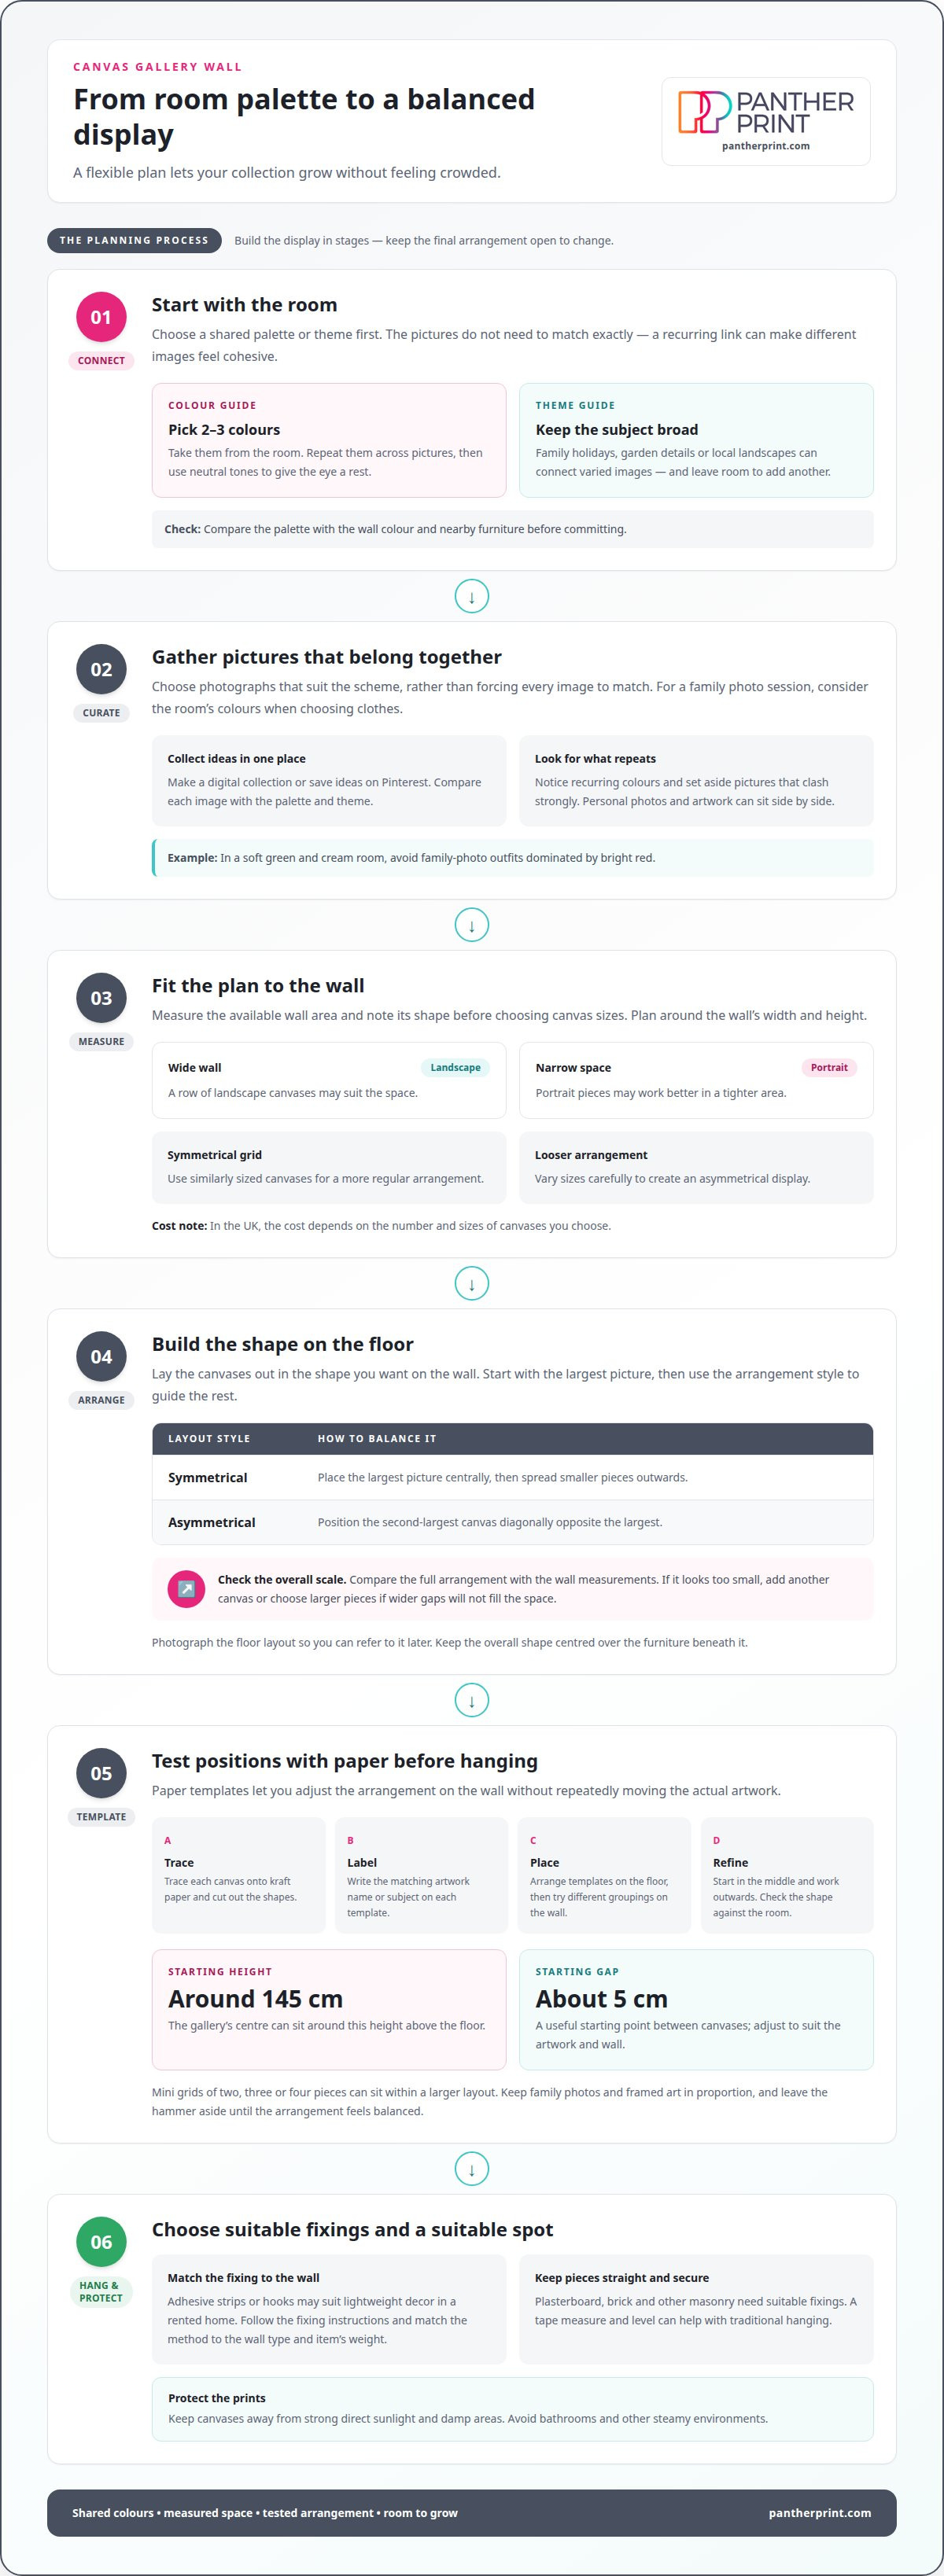
Choose two or three colours from the room and use them to link the collection. For example, repeat the deep blue of a rug and the warm terracotta of a cushion across several pictures, with neutral tones to give the eye a rest. Check the palette against the wall colour and nearby furniture before committing.
-
Select photographs to suit the scheme
Choose photos that include colours from your palette, rather than expecting every image to match exactly. If you’re planning a family photo session, consider the room’s scheme when choosing clothes. For a soft green and cream palette, for example, avoid outfits dominated by bright red. This helps the photographs sit comfortably with the room’s existing colours.
- Choose a theme that connects different images. A collection of family holidays, garden details or local landscapes can include varied subjects and still feel cohesive. You can also combine personal photos with artwork, using a repeated colour to tie them together. Keep the theme broad enough to make adding another image easy.
- Gather possible images in one place before deciding what belongs in the display. Make a digital collection or save ideas on Pinterest, then compare each image with your palette and theme. Look for recurring colours and set aside pictures that clash strongly. This gives the gallery a clear direction before you plan the layout.
Planning canvas size, orientation and gallery layout
Measure the wall first, then plan the arrangement around its width and height. In the UK, the cost depends on the number and sizes of canvases you choose.
-
Plan canvas sizes and orientations
Measure the available wall area and note its shape before choosing canvas sizes. A wide wall may suit a row of landscape canvases, while a narrow space may work better with portrait pieces. Decide whether you want a symmetrical grid or an asymmetrical arrangement. For a grid, use similarly sized canvases; for a looser layout, vary the sizes carefully.
-
Arrange the gallery layout on the floor
Lay the canvases on the floor in the same shape as the wall, starting with the largest picture. For a symmetrical arrangement, place it centrally and spread smaller pieces outwards. For an asymmetrical display, position the second-largest canvas diagonally opposite the largest to balance the layout. Photograph the arrangement so you can refer to it when hanging.
-
Adjust a layout that looks too small
Compare the full arrangement with the wall measurements, not just one canvas. If the collection looks undersized, increase the gaps only if that helps it fill the space; otherwise add another canvas or choose larger pieces. A gallery’s centre can sit around 145 cm above the floor. Keep the overall shape centred over the furniture beneath it.
- Choose spacing that gives each picture room to stand out. A gap of about 5 cm between canvases is a useful starting point, then adjust it to suit the artwork and wall. Try mini grids of two, three or four pieces within the larger layout. Keep family photos and framed art in proportion, and use a phone photo or social media inspiration as a visual reference. Leave the hammer aside until the arrangement feels balanced.
Selecting artwork, frames and decorative pieces
Balance variety with a clear link, such as a shared colour, subject or finish. Mix canvases with framed art and other wall decor, keeping each item’s size and visual weight in proportion.
-
Combine canvases with framed art
Pair canvas prints with framed artwork, a mirror or a small decorative object to add texture. For example, place a landscape canvas beside a framed print, then repeat a colour in both pieces. Mix horizontal and vertical artwork, or arrange related pictures in pairs. Personal items can join the display too, provided they support its theme rather than compete with your favourite pieces.
- In a rented home, adhesive strips or hooks may suit lightweight wall decor and avoid nail holes. Follow the fixing instructions and match the method to the wall type and item’s weight. Plasterboard, brick and other masonry need suitable fixings. A hammer, tape measure and level can help with traditional hanging. Make sure each fixing is secure and use the level to keep pieces straight.
-
Choose frame thickness and finish
Compare the canvas edges with nearby frames before choosing a finish. A simple wrapped edge can sit neatly beside slim frames, while a more noticeable edge can hold its own among substantial framed artwork. Keep frame colours consistent for a calmer display, or mix them deliberately when the artwork connects the pieces. Avoid finishes that distract from the image.
- Use an empty frame or its insert as a template: trace its outline on paper, then test the position before hanging. Keep canvases away from strong direct sunlight and damp areas, which can affect prints and materials over time. Check the room’s light and moisture when choosing a spot, and don’t hang canvas prints in bathrooms or other steamy environments.
Mocking up a gallery wall with kraft-paper templates
Cut kraft paper to match each canvas, then test the arrangement before hanging. Templates let you adjust the display on the wall without moving the actual artwork.
-
Test arrangements with paper templates
Trace each canvas onto kraft paper and cut out the shapes. Write the matching artwork name or subject on each template, such as “family photo” or “landscape”. Arrange them on the floor first, then try different groupings on the wall. Start in the middle and work outwards, checking how the overall shape fits the room, blank wall or staircase.
-
Measure and mark the template positions
Measure the wall area you want the gallery to fill, then use its boundaries to guide template placement. Mark the centre point lightly with a pencil and build the arrangement around it. Keep the gaps consistent and check that the full display sits comfortably above nearby furniture. For a staircase, follow the rising line of the steps with your templates.
- Tape the paper shapes in place and step back to view them from the doorway and across the room. A template that looks balanced close up may feel crowded from the sofa. Take a quick photo of the wall to assess the arrangement from another viewpoint. Move individual shapes until the collection feels balanced, then check the edges and gaps again.
- Use the templates to mark where each canvas will hang. Measure from the same edge of every paper shape, then clearly mark the fixing position before removing the paper. This keeps the intended placement visible as you work. If canvases belong in a pair or small group, label both templates so each piece goes in its planned position.
- Once the paper layout feels right, use it as your hanging guide. Browse canvas prints for your gallery wall to find artwork that suits the planned shapes and arrangement.
Panther Print
Panther Print helps you bring your gallery-wall plan to life with canvas artwork for different rooms and tastes. Once you’ve settled on a layout, browse options that complement its colours, subject and shape. Choose Abstract Canvas Prints for a graphic touch, Animals & Wildlife for nature-inspired character, Art for Kids & Nursery Art for a child’s room, or Banksy Canvas Prints for a recognisable urban feel. These choices can sit alongside personal photos and other artwork, helping your collection feel considered rather than assembled at random. Select pieces that work with the space you’ve measured and the arrangement you’ve tested with paper templates. When you’re ready to discuss your gallery-wall choices, contact Panther Print.
Make your wall feel like yours
Knowing how to create a gallery wall with canvas prints gives you a starting point, not a set of rules. Let the finished display reflect the people, places and ideas you want to live with. A favourite canvas can make a room feel more personal, while new artwork can bring a fresh mood as your tastes change.
Explore Panther Print’s Abstract Canvas Prints, Animals & Wildlife, and Art for Kids & Nursery Art to find artwork that suits your space. There’s no need to make every choice at once. Start with a piece you love, then let the room guide what comes next.
Ready to choose artwork for your wall? Contact Panther Print for canvas advice, and take the next step towards a gallery that feels like home.
Frequently Asked Questions
Can I add to it later?
Yes. Treat the first arrangement as the start of a collection, not a finished set. If you’re learning how to create a gallery wall with canvas prints, leave room for future additions and choose pieces with a visual link, such as a recurring subject or mood. If a new canvas doesn’t quite match, place it nearby rather than forcing it into the original grouping.
Do all the frames need to match?
No. Matching frames create a tidy, uniform look, while different colours or finishes can make the wall feel more relaxed. For a mixed collection, repeat one detail, such as a dark border or natural wood, to connect the frames. Canvas prints can sit alongside framed pictures too, so every piece doesn’t need the same frame.
How do you pick the right wall?
Choose a wall where you can see the artwork from places you use most, such as the sofa or dining table. Consider nearby furniture, doors and shelves, as these affect the available space and the display’s outline. Don’t hang canvas prints in bathrooms or other steamy environments. A clear, dry wall helps the artwork suit the room and stay in view.
How many pieces should I use?
Choose a number that suits the wall and the scale of the artwork. Three or five pieces can make a balanced focal point, while a larger wall can take a broader collection. For a compact arrangement, group two, three or four pictures in a small grid. Think about the display’s overall shape rather than adding pieces just to reach a particular number.
How do you plan the layout for a gallery wall with canvas prints?
To work out how to create a gallery wall with canvas prints, begin with the wall’s shape and build around the largest canvas. A neat grid suits pieces of similar dimensions, while mixed sizes create a looser display. Balance portrait and landscape canvases, and consider how the arrangement relates to a sofa, mantel or staircase. A phone photo can help you compare possible layouts.
How much space should you leave between canvas prints on a gallery wall?
A gap of 5-10 cm is a useful guide between pieces. Keep the distance consistent across the display, including between canvases arranged in pairs or small groups. For a relaxed arrangement, assess the whole wall from your usual viewing spot. If one gap looks noticeably wider than the others, adjust the layout before hanging the prints.