
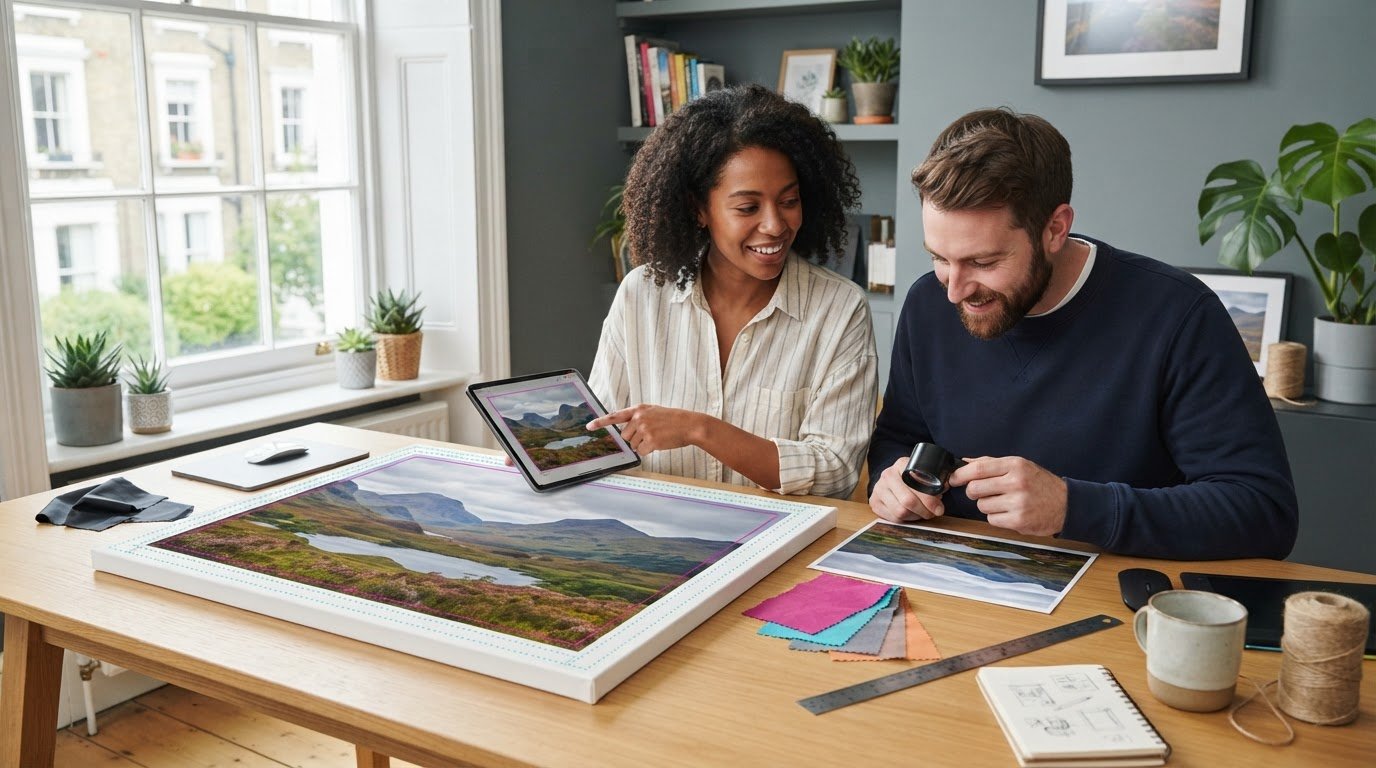
Could your favourite photo look softer, darker or more tightly cropped on canvas than it does on your screen? Getting it ready doesn’t require complicated editing. If you’re wondering how to prepare photo for canvas, a few practical checks can help you choose a suitable image and prepare it with confidence.
Before uploading, check the photo’s clarity, crop and colour, then review the final preview. Keep important details away from the canvas edges, make only modest edits and compare the image with the layout you plan to order. This checklist covers each step, helping you turn a personal photo into a bespoke, handmade photo-on-canvas print that’s ready to display.
Key Takeaways
- Learn how to prepare photo for canvas with practical checks for clarity, composition and suitability.
- Understand how image dimensions affect print detail, and why file size alone can’t tell you whether a photo will print sharply.
- See how portrait, landscape and square print shapes can change the crop, and how to keep key subjects in view.
- Make small colour and brightness edits without losing the look of the original photo.
- Review the crop, edges and corners in the final preview before ordering.
How to Prepare a Photo for Canvas: Start with These Image Checks
A phone or camera photo can make a lovely canvas print without looking like a professional studio shot. Start by checking that the main subject is clear and the composition suits the print shape you’re considering. A photo is a good candidate when its key details remain clear and well framed after cropping.
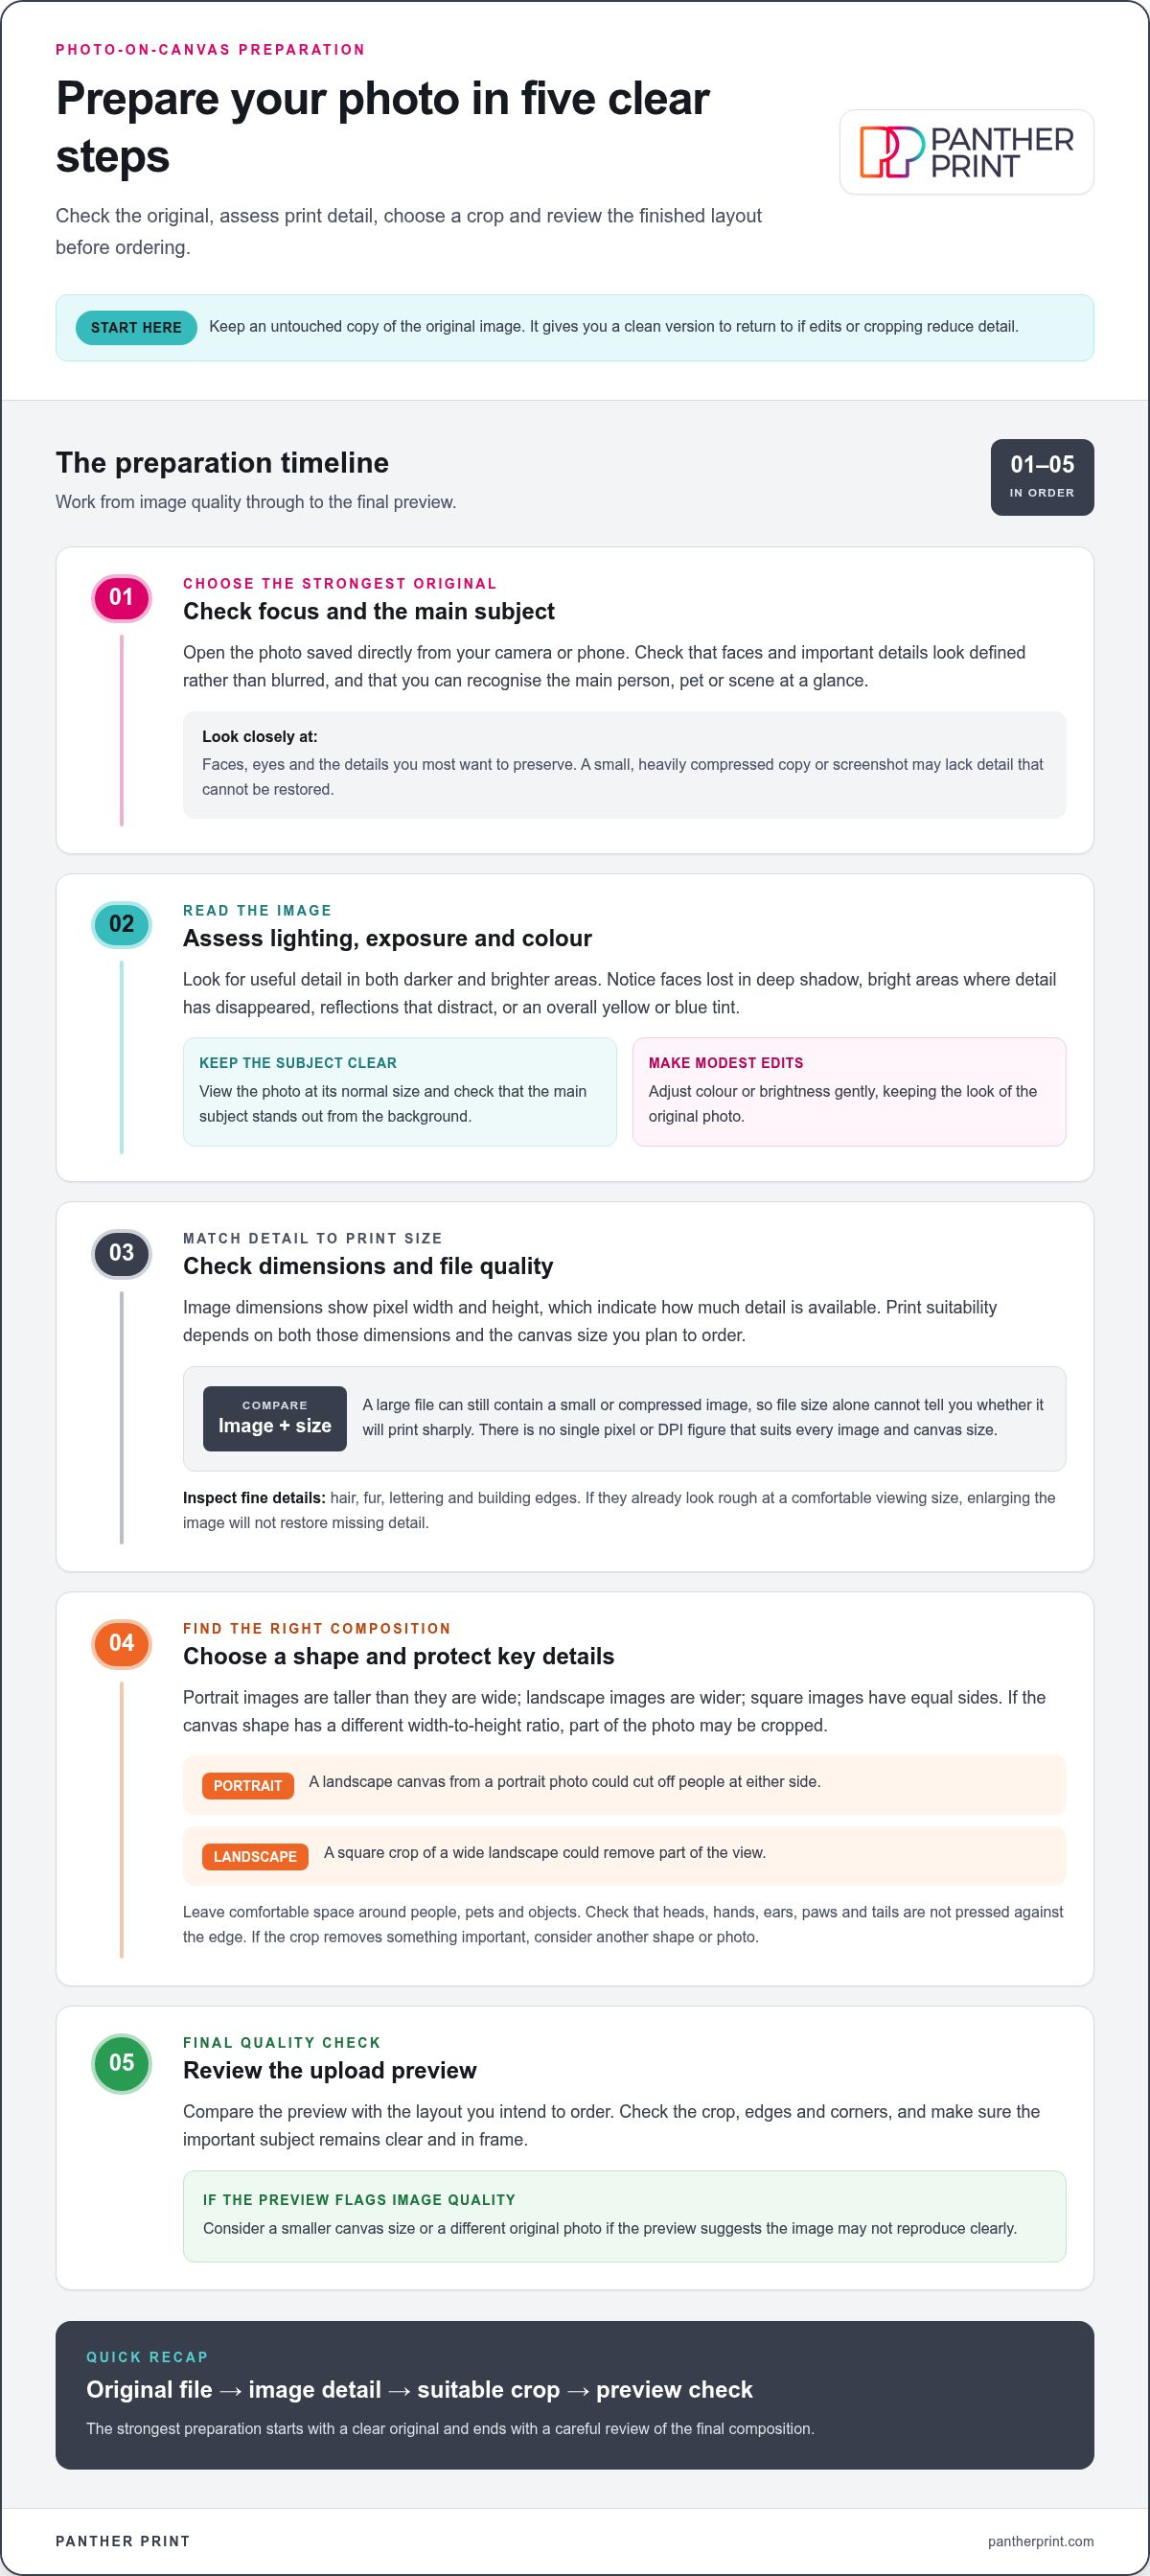
To work out how to prepare photo for canvas, open the original image and check these essentials:
- Focus: Are faces and other important details in focus rather than blurred?
- Subject: Can you identify the main person, pet or scene at a glance?
- Lighting: Can you see useful detail in both darker and brighter areas?
- Resolution: Is there enough image detail for the canvas size you have in mind?
- Original file: Can you use the photo saved directly from your camera or phone?
Image dimensions matter more than file size alone. Dimensions show the pixel width and height, which indicate how much detail is available to print. A large file can still contain a small or compressed image, so megabytes alone don’t tell you whether it will look sharp. There isn’t one pixel or DPI figure that suits every canvas size.
Is the photo sharp enough to enlarge?
Zoom in on faces, eyes and the details you most want to preserve. They should look defined, not smeared or fuzzy. A sharp original holds detail; a small or heavily compressed copy can’t restore it. Choose the original camera or phone file rather than a screenshot or social media copy. Blur in the source image is usually more noticeable when it’s enlarged.
Check lighting, exposure and the main subject
Look for faces lost in deep shadow, bright areas where detail has disappeared, and reflections that distract from the subject. Then view the photo at its normal size. Does the main subject stand out from the background? Check for an overall yellow or blue tint, too. This can indicate a colour cast; Color Balance in Photography explains how colour balance affects an image.
A candid photo can still work well, even if the lighting isn’t perfect. Focus on whether the details you care about are clear and the subject is easy to recognise. Keep the original file handy as you check its resolution and decide how to crop it.
Check Photo Resolution and File Quality Before Canvas Printing
Once you’ve found a photo that looks clear on screen, consider whether it has enough detail for your intended canvas size. A digital image is made from pixels, tiny units of colour that form the picture. If the image doesn’t contain enough pixels for the print area, it has to stretch to fill it, which can make edges look soft or blocky.
Print suitability depends on both the image dimensions and the intended output size. A photo that works well on a smaller canvas may not hold the same detail when enlarged substantially. There’s no single pixel count or DPI rule that fits every image and print size, so assess the photo against the size you plan to order rather than relying on a universal figure.
What do pixels and resolution mean for a canvas photo?
Think of pixels as the small coloured pieces that make up a digital photograph. More pixels provide more detail to work with, but the result also depends on how large the print area is. Cropping removes part of the image and can reduce the dimensions left for printing. Keep your intended canvas size in mind as you review the photo and its crop.
Check fine details such as hair, fur, lettering and building edges. If they already look rough at a comfortable viewing size, enlarging the image won’t restore detail that wasn’t captured. Review the upload preview for any quality warning or indicator for your selected size. If it suggests the image may not reproduce clearly, consider a smaller size or a different original photo.
Which photo file should you prepare?
Keep an untouched copy of the original before editing, converting or cropping. It gives you a clean version to return to if later changes reduce detail or you want to try another crop. For uploading, use a high-quality image file and follow the ordering tool’s guidance on accepted formats. A file extension alone can’t guarantee a sharp result.
Repeated saving, resizing or compression can remove image information, especially when you edit an already compressed copy. Avoid a screenshot, thumbnail or social media download when the original is available. If you’re unsure which version you have, compare the image dimensions and inspect the details at a comfortable viewing size. This helps you spot a smaller or lower-quality copy before uploading.
These checks are a practical part of how to prepare photo for canvas. Start with the strongest original, choose a suitable print size and review the preview before ordering. Panther Print’s bespoke photo-on-canvas printing turns your photograph into handmade wall décor. Explore photo-on-canvas prints.
Set the Crop and Keep Important Details Away from Canvas Edges
Before choosing a canvas shape, look at the photo’s aspect ratio: the relationship between its width and height. Portrait images are taller than they are wide, landscape images are wider, and square images have equal sides. If the print shape has a different ratio from your photo, some of the image may need to be cropped. This can change the composition, not just trim away background.
Start with the photo’s natural orientation and find the main subject. A landscape canvas made from a portrait photo could cut off people at either side. A square crop of a wide landscape could remove part of the view. Leave comfortable space around people, pets and objects so the image doesn’t feel cramped. If a crop removes something important, try a different shape or photo.
Choose a crop that suits the photograph
Picture the subject inside the proposed shape before settling on a crop. For a family photo, check that everyone remains in frame, with comfortable space around heads and hands. For a pet portrait, make sure ears, paws and tails aren’t pressed against the border. A tighter crop can bring the subject forward, provided it keeps the details that make the image feel complete.
Canvas edges need extra attention. Depending on the canvas layout, some of the image may continue around the sides. Details near the perimeter could shift onto an edge or be cropped, so keep faces, hands, text, logos and captions well inside the boundary wherever possible.
| View | What to look for | Edge risk |
|---|---|---|
| Uncropped image | See the full composition and where the subject sits. | Details close to the outer edge may be vulnerable if the image wraps. |
| Adjusted crop | Check what the selected shape removes and whether the balance still feels right. | A face, hand, caption or horizon could be clipped. |
| Final product preview | Review the image in the chosen canvas layout, including the sides if shown. | Look for details that may fall onto or beyond the edge. |
Allow for the canvas edge and preview
Use the product preview to check the crop in the selected layout. Look for cut-off faces, clipped text, awkward horizons and unexpected empty space. Inspect the corners as well as the centre. Review every edge in the final product preview before you proceed. This quick scan can reveal where the crop needs adjusting.
This is an important part of how to prepare photo for canvas: keep the composition comfortable, protect must-keep details and check that the chosen shape still tells the story of your photo. If the preview doesn’t feel right, adjust the crop or choose another image before ordering.
Edit Colour and Brightness Without Overworking Your Photo
A few careful edits can help your photo look balanced and natural. Aim to improve what’s already there, not transform the image into something that no longer resembles the moment you captured. Screens create light, while a printed canvas reflects light in the room, so colours and brightness may not look exactly the same on screen and in print.
Keep editing simple and reversible:
- Save a copy. Keep the untouched original, then edit a duplicate so you can start again if needed.
- Make small adjustments. Change exposure, contrast or white balance only as much as needed. Gently lift dark shadows or recover detail in bright areas.
- Review at normal size. Check the whole photo and its key details. Straighten a tilted horizon if it distracts from the scene.
- Compare with the original. Look for unnatural skin tones, overly strong colours or details that have disappeared.
Make simple edits that help the image
Small fixes can improve a photo without changing its character. A slight exposure adjustment may reveal a face in shadow; a gentle contrast change can help the subject stand out. Remove a distraction only if doing so doesn’t change the subject’s meaning. Clearing a stray mark, for example, is different from removing an object that is part of the story.
White balance affects how warm or cool colours appear. If a room-lit photo looks too yellow, a modest correction may bring whites closer to neutral. You may see sRGB, a common digital colour-space term. Treat it as a file-setting detail, not a promise that the print will exactly match your screen, and follow any uploader guidance provided.
Avoid edits that can make the print look worse
Use sharpening and saturation sparingly. Too much sharpening can create bright outlines, called halos, around edges; heavy saturation can make skin, skies or flowers look unnatural. Dramatic filters may hide subtle details. Avoid digitally enlarging a small photo in the hope that added pixels will restore genuine detail. Enlarging can increase the image dimensions, but it won’t bring back information that wasn’t in the original.
If your picture includes text, borders or collage elements, zoom out and check that they remain clear and sit comfortably inside the intended crop. A decorative border can look uneven after resizing, and small lettering may become difficult to read. Save the final edit as a separate file and leave the original unchanged.
When your image is ready, create a bespoke photo-on-canvas print with Panther Print.
Use This Final Checklist Before Ordering Your Photo on Canvas
You’ve checked the image, chosen a crop and kept your edits modest. Before ordering, bring those decisions together in one final review. This pass helps catch details that are easy to miss when you’re focused on the photo as a whole. Use the checklist on screen or save it for the next time you prepare a favourite picture.
The quick pre-upload photo checklist
- Start with the right file. Choose the original photograph or a high-quality copy, not a screenshot, thumbnail or repeatedly compressed version. Store the untouched original separately from your edited copy.
- Check the detail. Look at the main subject and the features you want people to notice. Faces, eyes and other important details should appear clear, not smeared or blocky.
- Review the light and colour. Make sure the subject is visible, shadows aren’t hiding details and bright areas haven’t lost all definition. Keep colours natural and edits modest.
- Check orientation and composition. Make sure the print shape suits the photograph. Confirm the subject sits comfortably in the frame and the crop doesn’t feel cramped or unbalanced.
- Protect important details. Keep faces, hands, text, logos and other must-keep features away from the outer edges. Consider how the canvas layout may treat image content around its sides.
- Look at the preview. Compare it with the composition you intended. Check for an unwanted crop, clipped text, an awkward horizon or unexpected empty space.
Take a moment with the final preview. Scan every corner and edge, not just the centre. If the picture includes a caption or border, check that it remains legible and safely inside the crop. Adjust the composition if anything important sits too close to the perimeter. The preview helps you compare the photo you chose with the layout shown for the canvas.
Review the preview and take the next step
Once you’re happy with the preview, keep both versions of your image: the untouched original and the final edited file. Clear file names can help distinguish them, especially if you’ve tried more than one crop. The original gives you a clean starting point for future use, while the final copy preserves the version you prepared for this canvas.
Knowing how to prepare photo for canvas doesn’t mean making endless changes. Choose a clear image, check the crop carefully and review the final layout. As you consider photo on canvas prints, think about how the image’s shape and composition will suit the space where you’d like to display it.
Panther Print’s bespoke photo-on-canvas printing turns your personal photograph into handmade, ready-to-display wall décor.
Give a Favourite Moment a Place at Home
A personal canvas can do more than fill an empty wall. It can bring a much-loved moment into view, from a family gathering to a favourite landscape. As you decide where your photo belongs, picture how it will look in the room and whether it’s a scene you’ll enjoy seeing often.
Knowing how to prepare photo for canvas gives you a confident starting point. Panther Print turns your photograph into a bespoke canvas print, handmade and ready to display as wall décor. Your chosen image can become a personal feature in your home, with the memory behind it close by.
Turn your favourite photo into canvas wall art with Panther Print.
Frequently Asked Questions
Can I use a photo from my phone for a canvas print?
Yes, a phone photo can work well if it’s in focus and saved at its original quality. You don’t need a professional camera for a personal canvas. Check that the image isn’t a tiny preview or heavily edited copy, then inspect the subject before choosing a print size. With portrait mode, check that the blurred background hasn’t softened an important detail, such as hair or a pet’s outline.
How do I know if my photo is high enough resolution for canvas?
Compare the image dimensions with the canvas size you have in mind, then use any quality warning in the upload preview as a practical guide. On many phones or computers, image details or file information show the pixel dimensions. There isn’t one resolution figure that suits every print. If the preview flags the image, consider a smaller canvas or another version of the photo.
Should I edit my photo before printing it on canvas?
Edit only if a small change will help the picture look more like the moment you remember. You might straighten a sloping building or adjust a colour cast from indoor lighting. Save a separate edited copy so you can compare it with the original. If the image already looks natural and clear, leave it as it is. Simple preparation is often enough.
What is the best file format for a canvas photo?
Use a high-quality image file in a format accepted by the upload tool. Follow its file-format guidance rather than converting your photo unnecessarily, as repeated saving can affect detail. You may also see the term sRGB, a common colour space for digital images. It can help with predictable colour handling, but it can’t guarantee an exact match between a screen and a printed canvas.
Will the edges of my photo be cropped on a canvas print?
They may be, depending on the canvas shape and how the sides are treated. Keep key details away from the perimeter and inspect the preview carefully. For a photo with a face or caption near the border, adjust the crop before ordering.
Can I use a screenshot or social media photo for a canvas?
You can upload one if it meets the upload requirements, but it may have less detail than the original. Screenshots capture only what’s visible on screen, while social media copies may be compressed or resized. For a clearer result, use the photo saved directly from your phone or camera. If you only have an online copy, inspect its details and the upload preview before choosing a canvas size.
Should I brighten my photo before printing it on canvas?
Possibly, if important areas look too dark on your screen, but make a small adjustment rather than heavily brightening the whole image. Check that lifting shadows doesn’t wash out faces or pale skies, and that highlights still show detail. Screens produce their own light, so a print may look different in your room. When considering how to prepare photo for canvas, judge the image at a comfortable viewing size and keep the edit natural.